Download this Auto Mouse Click Application to Automate Mouse Clicking, Mouse Dragging, Tapping, etc on your Windows 10 or Windows 11 Computer. There are lots of features in this Mouse Automation Software Utility and to launch Mini Auto Mouse Click Application, do have a look at the procedure outlined below to launch Mini Auto Mouse Click and use it. Yes, it can be really easy and fun to Automate Mouse Clicking and create your own Automated Mouse Clicker Script.
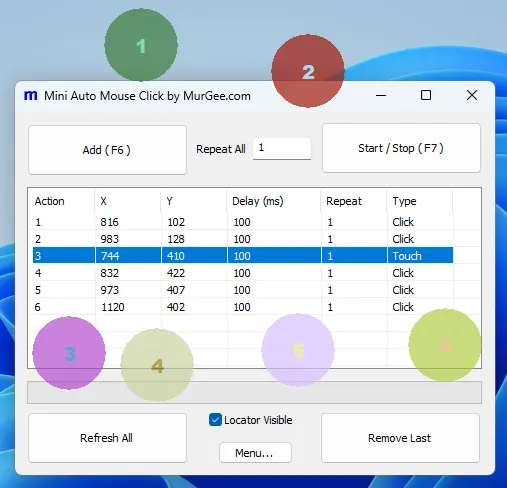
The Mini Auto Mouse Click Application allows you to pick Screen Location easily with a Keyboard Shortcut. To Mark a Click Location on Screen Display, Move Mouse Cursor to desired Screen Location and press the Keyboard Shortcut to Add new Click. Once you have identified / marked required Screen Locations where you wish to Auto Click / Tap, you can press the Keyboard Shortcut to Start / Stop the Clicking / Tapping Sequence to be performed.
The Marked Screen Locations identified with semitransparent circular / rectangular markers can be dragged with Mouse. You can even Right Click on any of the markers to view a Menu containing quick and easy way to edit it's parameters.
The Mini Auto Mouse Click Application presents a Graphical User Interface that is really intuitive and you can get started within minutes. Whether you wish to Automate Mouse Clicking at Single or Multiple Screen Locations, this Easy to Understand and learn Application can really save you time and efforts when you need to Click for a long period of time.
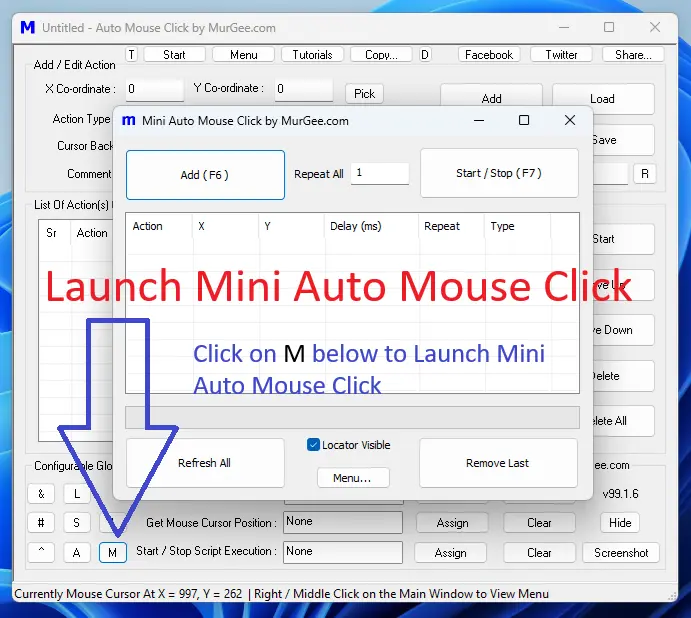
Launch Mini Auto Mouse Click
To get started with using Mini Auto Mouse Click, Download Auto Mouse Click, install it and Launch Mini Auto Mouse Click Application Utility as displayed in the Screenshot below. Whenever you wish to use advanced Mouse Clicking features, you can use other features of the Auto Mouse Click Application.

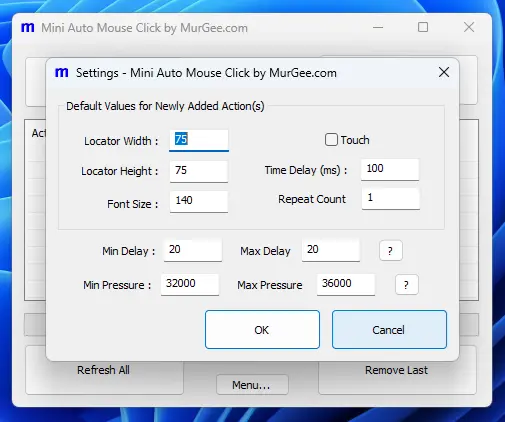
Control Default Values and other Parameters of Mini Auto Mouse Click from Settings
The Mini Auto Mouse Click Application is configurable with configurable parameters. The Software Parameters which are applicable for all the Click / Tap Locations can be configured from Settings of the Software. You can Right Click on the Main Screen of Mini Auto Mouse Click Application and from the ppup Menu, Click on Settings Menu Item. To Launch Settings Screen of Mini Auto Mouse Click Utility, you can alternatively Click on Menu button provided at the bottom of the Software and Click on Settings Menu Item.

